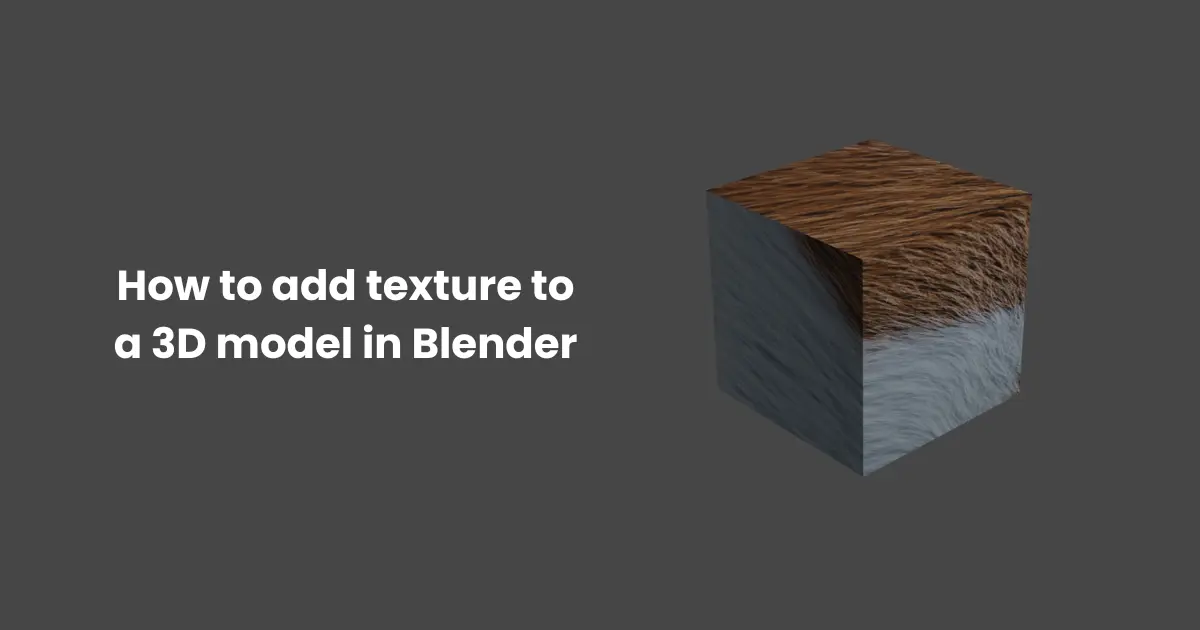
How to add texture to a 3D model in Blender | Best tips to addTexturing In blender
Contents
- 1 Preparing Your 3D Model
- 2 How to Add Texture to a 3D Model in Blender
- 3 Using Blender’s Texture Paint Mode
- 4 Advanced Techniques for Adding Texture to a 3D Model in Blender
- 5 Common Issues and Troubleshooting
- 6 Tips for Optimizing Textured Models
- 6.0.1 1. Optimize Texture Resolution
- 6.0.2 2. Use Texture Compression
- 6.0.3 3. Bake Textures
- 6.0.4 4. Optimize UV Mapping
- 6.0.5 5. Use Tiling and Reusable Textures
- 6.0.6 6. Combine Texture Maps
- 6.0.7 7. LOD (Level of Detail)
- 6.0.8 8. Avoid Overly Complex Shaders
- 6.0.9 9. Reduce Texture Memory
- 6.0.10 10. Use Decals for Detail
- 6.0.11 11. Leverage Material Instancing
- 6.0.12 12. Test in the Target Environment
- 6.1 Conclusion
Texturing is a vital step in 3D modeling that transforms a plain 3D object into a visually compelling masterpiece. By adding textures, you can define the surface details, such as colors, patterns, roughness, or glossiness, that make the model realistic or stylized. Whether you’re working on a character, a game asset, or a product prototype, texturing brings your 3D models to life.
Blender, an industry-leading 3D creation suite, offers a robust set of tools for texturing. With its powerful Shader Editor and UV Mapping capabilities, Blender enables creators to apply textures with precision and artistry. Whether you’re a beginner or a seasoned 3D artist, learning how to add texture to a 3D model in Blender can elevate the quality of your projects significantly.
In this guide, we’ll delve into the step-by-step process of texturing, covering everything from preparing your model to fine-tuning details in Blender’s rich interface.
Preparing Your 3D Model
Before diving into the process of how to add texture to a 3D model in Blender, it’s essential to ensure your model is properly prepared. A clean and well-organized model lays the foundation for successful texturing and reduces potential issues later.

1. Clean Up the Model
- Remove Unnecessary Geometry: Check for and delete any duplicate or overlapping vertices. Use the Merge by Distance feature to clean up stray vertices or edges.
- Shortcut: Select your model, press
Tabto enter Edit Mode, then useM> Merge by Distance.
- Shortcut: Select your model, press
- Check for Non-Manifold Geometry: Non-manifold geometry can cause problems during UV unwrapping. Use the Select Non-Manifold tool (
Shift + Ctrl + Alt + M) to identify and fix problematic areas. - Apply Transforms: Ensure the scale, rotation, and location of your model are properly applied to avoid distortions during UV mapping.
- Shortcut: Select your object and press
Ctrl + A, then choose Apply All Transforms.
- Shortcut: Select your object and press
2. Ensure Proper UV Mapping
- What is UV Mapping?
UV mapping is the process of projecting a 2D texture onto a 3D model. Think of it as unfolding a cube into a flat surface so you can paint on it accurately. Proper UV mapping ensures your textures don’t stretch or warp. - Unwrapping the Model:
- Select your model, enter Edit Mode (
Tab), and pressUto access unwrapping options. - Choose the appropriate unwrapping method, such as Smart UV Project (for beginners) or UV Unwrap for more control.
- Select your model, enter Edit Mode (
- Editing UV Layouts: After unwrapping, use the UV Editor to organize and scale the UV islands. Avoid overlapping UV islands unless necessary for mirroring textures.
By cleaning your model and creating an accurate UV map, you ensure a seamless process when adding textures. With these steps completed, you’re ready to dive into the exciting part: learning how to add texture to a 3D model in Blender!
How to Add Texture to a 3D Model in Blender
Adding texture to a 3D model in Blender involves several key steps, from applying a material to fine-tuning details using Blender’s advanced tools. Here’s a comprehensive guide to help you texture your models effectively.

1. Create and Assign a Material
- Open your 3D model in Blender and select it.
- Go to the Material Properties tab (the sphere icon) in the right-hand panel.
- Click New to create a material for your model. This material acts as a container for your texture settings.
- Rename the material for better organization (e.g., “Wood_Texture” or “Metal_Surface”).
2. Add a Texture to the Material
- With your material selected, switch to the Shader Editor (found in the bottom or side panels).
- You’ll see the default Principled BSDF shader connected to the Material Output.
- To add a texture:
- Press
Shift + Ato open the Add Menu. - Navigate to Texture > Image Texture, then click to place it in the Shader Editor.
- Connect the Color output of the Image Texture node to the Base Color input of the Principled BSDF shader.
- Press
3. Load and Apply a Texture Image
- In the Image Texture node, click Open and browse your computer to load a texture image (e.g., a JPEG or PNG file).
- Once loaded, the texture will automatically apply to your model, but it may look stretched or distorted if UV mapping isn’t configured correctly.
4. Adjust UV Mapping
- Ensure your model has a proper UV map (see “Preparing Your 3D Model”).
- Switch to the UV Editor to preview and adjust how the texture wraps around your model.
- Use the Scale (
S), Rotate (R), and Move (G) tools to refine UV islands and align the texture properly.
5. Fine-Tune Texture Properties
- In the Shader Editor, you can tweak additional texture properties:
- Roughness: Adjust this value to control how shiny or matte the surface looks.
- Normal Maps: Add a Normal Map node for realistic surface details like bumps or scratches.
- Transparency: Adjust the Alpha settings in the texture if your material requires transparency.
6. Preview the Textured Model
- Switch to Material Preview or Rendered View in the 3D viewport to see how the texture looks on your model.
- Make sure your lighting setup complements the texture for better visualization.
7. Bake the Texture (Optional)
- For game assets or optimized models, baking combines all texture properties into a single image, reducing the processing load.
- Go to Render Properties and configure the bake settings.
- Use Bake to generate a texture map you can export.
By following these steps, you’ll successfully learn how to add texture to a 3D model in Blender, giving your models a professional and polished appearance. With practice, you can explore advanced techniques like procedural textures and texture painting for even greater creativity.
Using Blender’s Texture Paint Mode
Blender’s Texture Paint Mode is a powerful tool for adding custom details directly to your 3D model. It allows you to paint textures in real time, offering creative control over your model’s appearance. Here’s how you can leverage this mode while mastering how to add texture to a 3D model in Blender.
1. Set Up for Texture Painting
- Switch to Texture Paint Mode:
- Select your model in the 3D Viewport.
- From the top-left dropdown menu, switch to Texture Paint mode.
- Add a Base Texture:
- In the Material Properties tab, ensure your model has a material applied.
- Add an Image Texture node in the Shader Editor (if not already done). This image will be the canvas for your painting.
2. Create a New Texture Image
- In the Image Texture node, click New to create a blank texture.
- Set the resolution (e.g., 1024×1024 or 2048×2048 for high-quality details).
- Choose a base color for the texture (e.g., white for a neutral canvas).
- Name the texture for easy identification (e.g., “PaintLayer”).
3. Paint on the Model
- Brush Settings:
- Access the brush settings in the Tool Shelf on the left.
- Customize attributes like brush size, strength, and color.
- Painting:
- Click and drag on the model to paint directly onto its surface.
- Use the color picker to switch colors as needed.
4. Edit Texture with Layers
- Using Slots for Layers:
- In the Texture Paint panel, create additional slots for layers like base color, roughness, or metallic properties.
- This allows you to paint different material properties without affecting the base texture.
- Blending Modes:
- Use blending modes (e.g., Multiply, Overlay) to layer details like shadows or highlights.
5. Seamless Painting Across UV Edges
- Check for UV Seams:
- UV seams can disrupt your painting if not handled properly.
- Use the Clone Tool:
- Select the Clone Tool to copy texture details across UV seams for seamless results.
6. Add Stencils for Precision
- What Are Stencils?
- Stencils are guides that let you project intricate patterns or textures onto your model.
- How to Use Stencils:
- In the Texture Paint settings, load an image as a stencil.
- Use
Shift + RMBto move the stencil andCtrl + RMBto scale it. - Paint over the stencil to apply the pattern.
7. Save Your Work
- After painting, go to the Image Editor and save your texture.
- Use
Alt + Sor the menu option to ensure your painted texture is saved as an external file (e.g., PNG or JPEG).
8. Preview and Finalize
- Switch to Material Preview or Rendered View to inspect how the painted texture integrates with your model.
- Make additional adjustments if necessary.
By using Texture Paint Mode, you can add intricate, hand-painted details to your model, giving it a unique and artistic touch. This technique complements the knowledge of how to add texture to a 3D model in Blender, unlocking new levels of customization and creativity.
Advanced Techniques for Adding Texture to a 3D Model in Blender
Once you’ve mastered the basics of how to add texture to a 3D model in Blender, it’s time to explore advanced techniques. These methods allow for greater control, realism, and creativity, pushing the boundaries of what you can achieve with textures.

1. Using Procedural Textures
Procedural textures are generated mathematically, allowing for endless customization without relying on image files.
- How to Create Procedural Textures:
- In the Shader Editor, press
Shift + Aand add nodes like Noise Texture, Voronoi Texture, or Wave Texture. - Combine these nodes with a ColorRamp to refine the texture’s look.
- In the Shader Editor, press
- Advantages of Procedural Textures:
- No resolution limitations.
- Easy to tweak and replicate across different models.
Example: Use procedural textures to create realistic materials like wood grain, marble, or rust.
2. Texture Baking
Baking combines multiple texture layers and effects into a single image, optimizing performance for games or rendering.
- Steps to Bake Textures:
- Select your object and go to the Render Properties tab.
- Set the bake type (e.g., Diffuse, Normal, Ambient Occlusion).
- Create a new image in the UV/Image Editor and assign it to the material’s Image Texture node.
- Click Bake to generate a texture map.
- Applications:
- Use baking to precompute lighting, shadows, and surface details for real-time applications.
3. Using Texture Nodes for Complex Materials
Blender’s Shader Editor allows for intricate material setups using node combinations.
- Layering Textures:
- Use Mix Shader or MixRGB nodes to blend multiple textures.
- Connect different textures to control properties like roughness, metallicity, and displacement.
- Mapping Adjustments:
- Add a Mapping node to scale, rotate, or offset textures for precision.
- Adding Detail:
- Combine textures with noise maps to simulate dirt, wear, or organic imperfections.
Example: Create a metal surface with scratches and dirt by blending a base metal texture with procedural noise.
4. Normal and Bump Mapping
Add surface details without increasing geometry by using normal or bump maps.
- Steps to Add a Normal Map:
- Load a normal map into the Shader Editor using an Image Texture node.
- Connect it to a Normal Map node and then to the Normal input of the Principled BSDF shader.
- Difference Between Normal and Bump Mapping:
- Normal Mapping: Uses RGB data for precise surface details.
- Bump Mapping: Simulates height changes using grayscale images.
Application: Use these techniques for fine details like stone textures, wrinkles, or wood grain.
5. Displacement Mapping
Displacement mapping physically alters the geometry of your model based on a texture, providing highly realistic details.
- How to Use Displacement Mapping:
- Load a displacement map (grayscale image) into the Shader Editor.
- Add a Displacement node and connect it to the Material Output node’s Displacement input.
- Enable Adaptive Subdivision in the Modifier tab for smooth results.
- Applications:
- Use displacement for realistic terrains, detailed fabrics, or embossed patterns.
6. PBR Texturing (Physically-Based Rendering)
PBR texturing uses maps to simulate real-world material properties accurately.
- Required Maps:
- Base Color
- Roughness
- Metallic
- Normal
- Height/Displacement
- How to Apply PBR Textures in Blender:
- Import each map into the Shader Editor.
- Connect the maps to the corresponding inputs of the Principled BSDF shader.
Example: Use PBR textures to create a realistic metal surface with scratches, smudges, and reflections.
7. Decals for Added Detail
Decals are smaller textures projected onto a model to add localized details like stickers, logos, or dirt.
- Steps to Add Decals:
- Use a separate material slot for the decal texture.
- Adjust the UV mapping for precise placement.
- Blend the decal with the underlying material using transparency.
8. Advanced UV Mapping Techniques
- Multiple UV Maps: Create and use multiple UV maps for different texture layers.
- UV Packing Add-ons: Use Blender add-ons like UVPackMaster for efficient UV layouts, minimizing wasted texture space.
By incorporating these advanced techniques, you can elevate the quality and realism of your 3D models. Whether you’re crafting game assets, architectural visualizations, or cinematic scenes, mastering these methods will make you an expert in how to add texture to a 3D model in Blender.
Common Issues and Troubleshooting
When learning how to add texture to a 3D model in Blender, you might encounter challenges that disrupt your workflow or affect the final results. Below are some common issues and troubleshooting tips to ensure a smooth texturing process.

1. Textures Not Showing on the Model
- Possible Causes:
- Material is not applied to the model.
- The texture is not properly connected in the Shader Editor.
- Solutions:
- Verify that the material is assigned to the model in the Material Properties tab.
- Check the Shader Editor to ensure the Image Texture node is connected to the Base Color input of the Principled BSDF shader.
- Switch to Material Preview or Rendered View in the viewport to see the texture.
2. Texture Appears Stretched or Distorted
- Possible Causes:
- UV mapping is not set up correctly.
- UV islands are overlapping.
- Solutions:
- Check the UV layout in the UV Editor.
- Use Smart UV Project (press
Uin Edit Mode) to create a basic UV map. - Manually adjust UV islands by scaling, rotating, or moving them to fit the texture correctly.
3. Blurry or Low-Resolution Textures
- Possible Causes:
- The texture image resolution is too low.
- Texture filtering is causing blur.
- Solutions:
- Use a high-resolution image (e.g., 2048×2048 or higher).
- In the Shader Editor, click on the Image Texture node and change the interpolation setting from Linear to Closest for sharper details.
4. Seams Visible on the Texture
- Possible Causes:
- UV seams are not blended properly.
- Texture alignment issues across seams.
- Solutions:
- Use the Clone Tool in Texture Paint mode to blend colors across seams.
- Adjust UV mapping to reduce distortion around seams.
- For procedural textures, use the Box Mapping option to avoid seam issues.
5. Texture Not Aligning Properly
- Possible Causes:
- Incorrect texture mapping coordinates.
- Misaligned UV layout.
- Solutions:
- Add a Mapping node and a Texture Coordinate node in the Shader Editor to control texture placement.
- Use the UV Editor to adjust the UV layout manually for precise alignment.
By addressing these common issues, you can ensure a more efficient workflow when adding textures to your 3D models. Troubleshooting effectively is an essential skill that complements your knowledge of how to add texture to a 3D model in Blender, enabling you to achieve professional-quality results.
Tips for Optimizing Textured Models
Optimizing textured 3D models is essential for enhancing performance, especially in real-time applications like games or VR. Here are some practical tips to ensure your textured models are efficient without compromising quality.

1. Optimize Texture Resolution
- Use the smallest resolution that still delivers the desired quality.
- Avoid unnecessarily high resolutions for details that won’t be visible in the final output.
- Common resolutions:
- 512×512 or 1024×1024 for smaller objects.
- 2048×2048 or higher for detailed, close-up objects.
2. Use Texture Compression
- Compress textures to reduce file size and memory usage.
- Popular formats:
- JPEG for general use (lossy but small).
- PNG for lossless quality.
- Specialized formats like DDS or KTX for real-time applications.
3. Bake Textures
- Bake complex materials and lighting into texture maps to simplify shader complexity.
- Bake maps like:
- Diffuse (Base Color).
- Ambient Occlusion.
- Normal Maps for surface details.
- This reduces the computational load during rendering.
4. Optimize UV Mapping
- Minimize wasted UV space by arranging UV islands efficiently.
- Use packing tools like Blender’s UV Pack or third-party plugins to optimize layouts.
- Ensure UV islands do not overlap unless they share identical textures.
5. Use Tiling and Reusable Textures
- Apply tiling textures for repetitive patterns like bricks, tiles, or grass.
- Reuse texture maps across multiple models where possible.
- Adjust scaling with a Mapping node in Blender to fit textures seamlessly.
6. Combine Texture Maps
- Use a single material with combined texture maps for efficiency:
- Merge maps like Roughness, Metallic, and Ambient Occlusion into one image’s RGB channels.
- Blender supports combining these maps using the Shader Editor.
7. LOD (Level of Detail)
- Create multiple versions of your model with varying levels of detail.
- Use lower-resolution textures and simplified geometry for distant objects.
- Blender supports exporting LODs for external engines like Unity or Unreal.
8. Avoid Overly Complex Shaders
- Limit the number of nodes in your material setup to reduce render times.
- Pre-bake intricate effects like procedural textures or volumetric details into static maps.
9. Reduce Texture Memory
- Use Non-Color Data for maps like normal, roughness, or displacement to save memory.
- Convert 32-bit images to 16-bit or 8-bit formats if high precision isn’t required.
10. Use Decals for Detail
- Instead of high-resolution textures, use decals for localized details like scratches, logos, or dirt.
- Decals can overlay textures without increasing the primary texture resolution.
11. Leverage Material Instancing
- Use instances of the same material for multiple objects to reduce memory overhead.
- Material instancing ensures that the same texture data is reused rather than duplicated.
12. Test in the Target Environment
- Always test textured models in the intended rendering environment (game engine, VR setup, etc.).
- Check for issues like memory bottlenecks, rendering lag, or texture artifacts.
By applying these techniques, you can create textured models that are visually impressive yet efficient. Whether you’re designing for games, animation, or real-time applications, knowing how to add texture to a 3D model in Blender and optimizing it effectively ensures your work meets technical and artistic standards.
Conclusion
Mastering how to add texture to a 3D model in Blender is a vital skill for any 3D artist, enabling you to bring your creations to life with detail, depth, and realism. From preparing your model and UV mapping to exploring advanced techniques like procedural texturing and displacement mapping, the process allows for endless creative possibilities. By understanding and implementing these methods, you can transform basic models into visually captivating assets suitable for animation, games, or rendering projects.
As you advance, remember that texturing is as much about creativity as it is about technical proficiency. Regularly experiment with different approaches, troubleshoot issues, and optimize your models for performance. Whether you’re crafting a hyper-realistic scene or a stylized art piece, your ability to texture effectively will make a significant impact on the final outcome. With Blender’s robust texturing tools and your growing expertise, the only limit is your imagination.

