What is Animatic Storyboard? | Best guide to make anamatics in 2025
Contents
- 1 The Basics of Storyboarding in Animation
- 2 What is an Animatic Storyboard?
- 3 Key Differences Between Storyboards and Animatics
- 4 How to Create an Animatic Storyboard
- 5 Common Tools and Software for Creating Animatic Storyboards
- 6 Examples of Animatic Storyboards in Animation
- 7 How Animatic Storyboards Improve Animation Production
In the world of animation, creating a compelling and visually coherent story requires more than just skilled drawing or animation techniques. One essential tool used by animators and filmmakers to plan out a narrative is the animatic storyboard. But what exactly is an animatic storyboard, and why is it so crucial in the production process?
An animatic storyboard is an evolved version of a traditional storyboard. While a standard storyboard is a series of static images that map out the visual sequence of a scene, an animatic storyboard takes things further by adding basic motion, timing, and sometimes even sound. This allows filmmakers and animators to better visualize how the final animation will flow, making it a key part of pre-production in animation, film, and even video game design.
Throughout this article, we will explore what an animatic storyboard is, its role in the animation pipeline, and how it contributes to the success of an animation project. By understanding the importance of animatics, animators, and filmmakers can harness this tool to produce high-quality, well-paced animations that engage their audience from start to finish.
The Basics of Storyboarding in Animation
Storyboarding is one of the first and most vital steps in the animation process. It serves as a blueprint for how the final animation will unfold, helping the creative team plan and visualize each scene before production begins. But what exactly does storyboarding involve, and why is it such an essential part of animation?
At its core, a storyboard is a series of drawings or illustrations that represent key moments or shots in an animated film or sequence. These sketches lay out the action, camera angles, character positioning, and transitions between scenes, providing a clear visual guide for the entire production team. The goal of storyboarding is to pre-visualize the entire animation so that everyone involved in the project—from animators to directors—has a shared understanding of the story’s flow and structure.
The storyboard process typically involves the following steps:
- Breaking Down the Script: The first step is to read and analyze the script to determine the key events, emotional beats, and important visuals that need to be captured in the animation. This stage helps identify the pacing, tone, and overall flow of the story.
- Sketching Key Scenes: Once the scenes are broken down, artists create rough sketches of the key moments. These sketches don’t need to be highly detailed; they’re designed to convey the basic composition, character positions, and actions of each scene.
- Sequencing the Shots: The sketches are then organized in sequential order, representing how the scenes will flow from one to the next. This gives the entire production team an overview of how the narrative will progress.
- Adding Annotations: In addition to the sketches, notes or annotations are often included to describe specific actions, camera movements, or other important details that need to be communicated to the team. For example, a note might explain that a scene needs to be in slow motion or that a particular camera angle is crucial for the storytelling.
Storyboards serve multiple purposes in animation production:
- Visualizing the Story: They allow the entire team to see the story before it’s fully animated, helping identify any problems with pacing, continuity, or flow early on.
- Guiding the Animation Process: Storyboards act as a roadmap for animators, providing them with a clear direction on how to bring the sketches to life.
- Communication Tool: Storyboards are a key communication tool that helps align the vision of the director, animators, designers, and other team members.
While traditional storyboards are static images, they provide the foundation for more advanced pre-visualization techniques, such as animatics. In the next section, we will dive deeper into the concept of animatic storyboards and how they build upon traditional storyboarding to improve the animation production process.
What is an Animatic Storyboard?
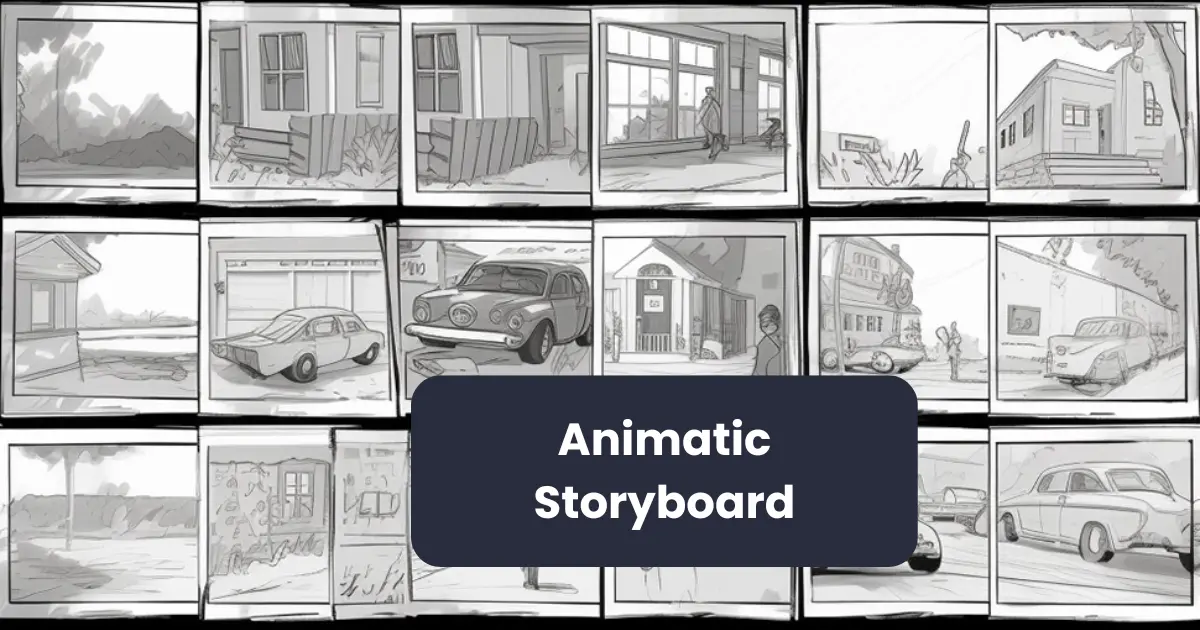
An animatic storyboard is a refined, dynamic version of a traditional storyboard that combines the same sequence of images with basic motion, timing, and often, sound. While a traditional storyboard is composed of static images that represent key moments or shots, an animatic storyboard takes these images a step further by adding motion, transitions, and timing to simulate how the animation will unfold in real-time.

In essence, an animatic storyboard serves as a pre-visualization tool, helping animators, directors, and producers get a clearer sense of how the final animation will look and feel before production begins. By adding motion and sound, the animatic storyboard gives a more accurate representation of pacing, rhythm, and the overall flow of the narrative, providing a more comprehensive view of the story.
How Animatic Storyboards are Used:
- Pre-Visualization: Animatic storyboards are used to pre-visualize the entire animation, allowing the team to see how the final product will come together before any full-scale production begins.
- Testing Pacing: By adding timing and movement to the storyboard, animatics help the team identify if the pacing of scenes is too fast, too slow, or needs adjustment. This allows for better control over the rhythm of the narrative.
- Collaboration and Communication: Animatics are an essential tool for communication among the production team. They allow everyone to see the same vision and provide feedback on the structure, pacing, and timing of the animation before committing resources to full production.
- Cost and Time Efficiency: Animatic storyboards help save time and money by allowing the team to make changes early in the process. Any issues with pacing, story flow, or visual elements can be caught before costly animation work begins, making it easier to implement changes.
Overall, an animatic storyboard serves as an invaluable tool in the animation process. It provides a more realistic preview of how the final animation will look and feel, allowing the creative team to refine their ideas and ensure that the animation meets their vision. By combining the visual clarity of storyboards with the dynamic elements of timing and motion, animatics provide an essential step in the production pipeline.
Key Differences Between Storyboards and Animatics
While both storyboards and animatics play a crucial role in the pre-production process of animation, there are distinct differences between the two. These differences primarily relate to how each is used, how they are created, and the level of detail involved. Understanding these differences is essential for animators, filmmakers, and production teams to use each tool effectively in the animation pipeline.

1. Level of Detail
- Storyboards: A storyboard consists of a series of rough sketches or images that depict the key moments or shots in the animation. These images are typically static and serve to convey the basic composition, character positioning, and major actions in each scene. The level of detail is usually minimal, focusing more on the essential elements of the scene rather than on fine details like textures, lighting, or color.
- Animatics: An animatic takes the static images from the storyboard and animates them, adding timing, movement, and often sound. The images in an animatic are still rough, but they are accompanied by motion and can be timed to simulate the pacing of the final animation. Animatics may include simple animations like camera pans, zooms, and character movements, making them more dynamic than storyboards.
2. Motion and Timing
- Storyboards: Storyboards are typically made up of still images with no motion or timing involved. They represent the shots or sequences, often in a series of panels or frames, but they do not give a sense of how long each scene or shot will last or how the visuals will flow.
- Animatics: Animatics incorporate motion and timing, providing a clearer representation of how the animation will unfold. Animators will use simple animations to show the flow of the scene, including the timing of character actions, camera movements, and transitions between shots. Animatics also establish the pacing of the scene, helping the team assess whether a scene is too long or too short.
3. Sound Integration
- Storyboards: In their traditional form, storyboards do not include any audio. They are purely visual and focus on showing the key moments in a sequence. Any sound elements (such as dialogue, music, or sound effects) are typically considered later in the production process after the visual plan is established.
- Animatics: Animatics often include temporary audio elements, such as scratch voiceovers, sound effects, or even a basic soundtrack. This addition of sound allows animators, directors, and producers to see how the visual and auditory elements work together, providing a more accurate preview of how the final animation will feel.
4. Purpose and Function
- Storyboards: The primary purpose of a storyboard is to provide a visual guide for the sequence of events in the animation. Storyboards are used to communicate the structure of the animation, define camera angles, and help plan the composition of each scene. They serve as the blueprint for the animation but are not intended to show movement or timing.
- Animatics: The main purpose of an animatic is to pre-visualize the final animation, allowing the team to get a sense of the timing, pacing, and flow of the scenes. Animatics serve as a test run of the animation, helping identify potential issues with pacing or timing before moving into full-scale production. They allow the team to experiment with the structure, pacing, and audio of the animation, making it easier to make adjustments early in the process.
How to Create an Animatic Storyboard
Creating an animatic storyboard is an essential step in the animation pre-production process. It allows you to visualize how your final animation will flow, including timing, pacing, and sound integration. By transforming static storyboards into dynamic, time-based sequences, animatics provide an early preview of the animation’s movement and rhythm, enabling you to refine the project before diving into full-scale production.

Here’s a step-by-step guide on how to create an animatic storyboard:
1. Start with a Detailed Storyboard
Before creating an animatic, you need a traditional storyboard. This step involves sketching the key scenes, shots, and actions of the animation. At this stage, you are mapping out the sequence of events without focusing on timing or motion.
- Break down the script: Review the script and decide on the essential moments that need to be depicted in your storyboard.
- Sketch keyframes: Draw each scene in a series of panels. These sketches should include the main composition, characters, camera angles, and major actions.
- Add annotations: Include notes about the movement, timing, or dialogue for each shot to guide the animatic creation.
2. Digitize Your Storyboard (If Not Already Done)
If your storyboard is on paper, you’ll need to digitize it before proceeding. Scan or photograph each frame and upload the images into your animation software of choice. Many animators prefer to work digitally to streamline the process, especially when planning to create the animatic using animation software like Adobe Animate, Toon Boom Storyboard Pro, or After Effects.
3. Create a Timeline for the Animatic
Once your storyboard is digitized, it’s time to create a timeline for the animatic. This timeline will map out how long each shot or scene should last and how the images will transition between one another.
- Import storyboard frames: Place the digital storyboard frames into the timeline in sequential order.
- Adjust timing: Decide how long each storyboard frame will be displayed. A typical duration for each frame might be 1 to 3 seconds, depending on the scene’s pacing.
The purpose here is to start visualizing the movement and transitions between scenes. Try to pace the shots according to the emotional and narrative beats of the story. For example, action scenes may require quicker cuts, while dramatic moments may need longer durations to build tension.
4. Add Motion and Transitions
Now it’s time to bring your storyboard to life by adding basic motion. This could include simple camera movements, such as pans, zooms, or transitions like fades and wipes. This step helps simulate how the animation will feel in motion, offering a sense of the scene flow.
- Animate camera movements: If your storyboard calls for a zoom-in or pan across the scene, animate these movements in the timeline. In some cases, you may need to adjust the storyboard frame’s position or scale to simulate this.
- Add scene transitions: Introduce smooth transitions between scenes, such as fades or cuts, to show how the animation will shift from one shot to the next.
At this stage, you are still using simple animations like moving frames or adjusting camera angles—nothing too complex. The goal is to get a sense of the rhythm and flow, not to perfect every detail.
5. Incorporate Sound (Scratch Audio)
Sound plays an important role in making the animatic feel more complete. Adding scratch audio—temporary voiceovers, sound effects, or background music—can help you better evaluate how the visuals and audio work together. This helps determine the timing and mood of each scene, ensuring the visuals align with the auditory elements.
- Voiceovers: Record temporary voiceovers for dialogue scenes. These don’t need to be final, but they should provide a sense of timing for the characters’ lines.
- Sound effects and music: Add basic sound effects (like footsteps or door creaks) and music to help set the tone and rhythm. Even if these sounds are placeholders, they will allow you to fine-tune the animation’s pacing.
- Sync audio to visuals: Adjust the timing of your storyboard frames to match the audio elements. This will help you assess if the pacing and flow of the animation work well with the sound.
6. Refine the Animatic
Once you’ve integrated sound and basic motion, it’s time to refine the animatic. Review the animatic from start to finish, keeping an eye out for any pacing issues, awkward transitions, or timing inconsistencies.
- Adjust shot duration: If a scene feels too rushed or too long, adjust the duration of each shot to find the right balance. Consider trimming unnecessary shots or extending critical moments to build tension.
- Smooth transitions: Ensure the transitions between scenes are smooth and that the flow of the animation feels natural. This is particularly important when transitioning between different locations or actions.
- Review audio: Listen to the scratch audio and make sure it aligns with the visuals. Adjust the timing of voiceovers, sound effects, or music if necessary.
During this phase, it’s helpful to gather feedback from others on the production team. Their input can highlight issues you might have missed or provide fresh ideas to improve the animatic.
7. Export the Animatic
Once the animatic is refined and you’re happy with the timing, motion, and audio, it’s time to export the final version. Export your animatic as a video file (usually in formats like MP4 or MOV) to share with your team or clients for approval.
Be sure to save the animatic in a format that’s compatible with the software or devices your team uses to review the content. You may also want to create a few different versions for various stakeholders, such as a version with scratch audio for sound designers or one without audio for animators.
Common Tools and Software for Creating Animatic Storyboards
Creating an animatic storyboard requires the right set of tools to help transform static storyboards into dynamic sequences with motion, timing, and sound. There are various software options designed to assist animators in crafting high-quality animatics, each offering a unique set of features to streamline the process. Whether you’re working on a small project or a major animation production, the following tools and software can greatly enhance your workflow.

1. Toon Boom Storyboard Pro
Toon Boom Storyboard Pro is one of the industry’s leading tools for creating professional-quality storyboards and animatics. It’s widely used in both animation studios and independent production environments.
- Key Features:
- Drawing and Sketching Tools: Offers robust drawing and sketching tools that allow you to create detailed storyboards directly in the software.
- Animation and Timing: Provides animation features that enable animators to add movement to their boards and adjust timing.
- Sound Integration: Supports audio tracks, allowing you to sync voiceovers, sound effects, and music with your storyboard frames.
- Camera Movements: Offers tools for animating camera moves, such as pans, zooms, and tilts, to simulate scene transitions.
- Collaboration: Multiple users can collaborate on the same project, making it ideal for team-based productions.
2. Adobe Animate
Adobe Animate is a versatile tool primarily used for animation but also highly effective for creating animatics. It offers a variety of features for animators, from basic animation to advanced motion graphics.
- Key Features:
- Vector Drawing Tools: Excellent for creating vector-based storyboards, which can be easily manipulated and resized without losing quality.
- Animation Features: Allows for frame-by-frame animation and tweening, which helps animate the storyboard frames to simulate movement.
- Audio Synchronization: Supports audio integration, allowing users to sync sound effects, dialogue, and music with the visuals.
- Timeline and Layer Management: Offers a robust timeline that helps in managing timing, transitions, and camera movements.
3. Adobe After Effects
Adobe After Effects is primarily known for motion graphics and visual effects but can also be used effectively to create animations. It’s often used in combination with other tools like Adobe Photoshop or Illustrator for drawing storyboard images.
- Key Features:
- Layer-Based Animation: Allows animators to animate storyboard panels by moving them in 2D space, adding transitions, and camera movements.
- Sound Synchronization: Offers advanced audio editing and syncing features, allowing animators to integrate dialogue, sound effects, and music precisely.
- Previsualization: Excellent for pre-visualizing complex shots, effects, and animations.
- Plugins and Effects: Offers a vast library of plugins and visual effects to enhance your animatic with dynamic transitions, color corrections, and more.
4. Clip Studio Paint
Clip Studio Paint is a popular tool among illustrators and animators for creating 2D animations. It’s especially favored by artists who prefer hand-drawn styles.
- Key Features:
- Storyboarding Tools: Includes a storyboard template that allows you to create and organize storyboard panels quickly.
- Animation Tools: Offers timeline-based animation tools to add basic motion to your storyboard frames.
- Drawing Features: Powerful drawing tools, brushes, and pens that are perfect for creating detailed hand-drawn storyboards and animatics.
- Frame-by-Frame Animation: Ideal for animating rough movements and simulating how the final animation will flow.
5. Blender
Blender is a free, open-source 3D creation suite, but it also offers robust 2D animation tools that are ideal for creating animatics. Its flexibility allows it to be used for both 2D and 3D animation projects.
- Key Features:
- 2D Animation with Grease Pencil: Blender’s Grease Pencil tool allows for 2D animation and storyboarding within a 3D space, making it great for both 2D and 3D animatics.
- Timeline and Keyframing: Powerful timeline and keyframing tools to animate characters, objects, and camera moves.
- Sound Synchronization: Supports audio synchronization, making it easy to integrate sound effects, music, and voiceovers.
- 3D Camera and Scene Previews: Allows you to preview 3D camera movements and transitions to help visualize complex scenes.
Examples of Animatic Storyboards in Animation
Animatic storyboards play a crucial role in the animation process by offering a rough, time-based preview of an animated project. These early-stage versions of the animation allow for the visualization of camera movements, timing, and pacing before the full animation is created. Below are some notable examples from well-known animated films and TV shows that showcase how animatic storyboards are used in the industry.
1. Pixar’s “Toy Story” (1995)
Toy Story, the groundbreaking animated feature film from Pixar, was one of the first full-length computer-animated films. During the production process, animatics played a critical role in refining the narrative and visual pacing.
Example: In one famous scene, Woody and Buzz Lightyear argue over who is in charge of the toys. The animatic helped determine the pacing of the argument, the timing of each character’s movement, and the interaction between the toys’ emotions and the visuals.
2. Disney’s “The Lion King” (1994)
In The Lion King, Disney used animatics extensively to visualize the storytelling and key sequences before full animation began. The film’s iconic opening scene, “Circle of Life,” was carefully pre-visualized with an animatic to plan out the camera angles, transitions, and synchronization with the music.
Example: In the opening sequence, the animatic helped establish the grandeur of the African savannah landscape and how the camera would move across the scene. The animatic was integral in ensuring that the lion cub’s arrival felt as epic as the music itself.
3. DreamWorks’ “Shrek” (2001)
DreamWorks used animatics throughout Shrek’s production to explore comedic timing and character interactions. The animatics helped establish the tone and humor, particularly for the film’s fast-paced dialogue and slapstick humor.
Example: In a scene where Donkey and Shrek are trying to escape from a dragon, the animatic showcased how their exaggerated movements would synchronize with the punchlines of the dialogue, giving the animators insight into the timing and physical comedy.
4. Studio Ghibli’s “Princess Mononoke” (1997)
In Princess Mononoke, Studio Ghibli used animatic storyboards to explore complex action sequences and emotional character arcs. The animatics were particularly helpful for refining intricate battle scenes and understanding how the characters interacted with their environment.
Example: In the final battle between the humans and the forest spirits, the animatic storyboard captured the brutal and chaotic nature of the fight while also balancing it with quieter, emotional moments between the characters.
How Animatic Storyboards Improve Animation Production
Animatic storyboards are a critical tool in the animation production pipeline. They bridge the gap between concept art and final animation, offering a visual blueprint that helps refine timing, pacing, camera movements, and the overall flow of a sequence. By incorporating rough sketches, basic animations, and audio, animatics bring storyboards to life, offering an essential preview of what the finished animation will look like. Here are several ways in which animatic storyboards improve the animation production process:

1. Refining Timing and Pacing
One of the primary functions of an animatic storyboard is to test and refine the timing and pacing of a scene. By turning static storyboards into a dynamic sequence with rough animation, animators can better understand the rhythm and flow of the story. This is especially crucial for scenes with fast-paced action, comedy, or emotional beats.
- How it Improves Production:
- Animatics allow animators to adjust the length of individual shots and sequences before committing to full animation.
- Pacing issues, such as scenes that feel too slow or too fast, can be identified early, reducing the need for major revisions later in the production process.
Example: In a fight scene, animatics can show whether the timing of punches, reactions, and pauses is appropriate, ensuring that the scene flows smoothly and the action feels natural.
2. Visualizing Camera Movements
The camera movement is a critical aspect of storytelling in animation. Animatic storyboards allow the production team to test camera angles, zooms, pans, and tilts. By adding rough movement and transitions, animatics provide a better understanding of how the camera will guide the viewer’s attention and shape the narrative.
- How it Improves Production:
- Camera moves that may seem effective in theory can be tested in animatics to ensure they contribute to the scene’s emotional or dramatic impact.
- Directors can quickly see if camera movements are too abrupt, disorienting, or too slow, allowing for adjustments before the scene is fully animated.
Example: A sweeping shot of a landscape in an epic scene can be tested with an animatic to see if the camera smoothly transitions, focusing on key elements in the scene, or if it distracts the viewer.
3. Testing Animation and Action Sequences
Animating complex action sequences can be time-consuming and expensive. Animatics provide a low-cost, low-risk way to test these scenes and visualize how the characters and objects will move.
- How it Improves Production:
- Animatics help ensure that action sequences are clear, fluid, and easy to follow by simulating the movements of characters and objects.
- Animators can work out the flow of the action, including the timing of special effects, character interactions, and the overall choreography, before starting the detailed animation work.
Example: In an intense chase scene, animatics allow the production team to visualize how characters’ movements, background elements, and obstacles interact. This prevents wasted time on animation that may need to be reworked later.
4. Incorporating Audio Early in the Process
Another advantage of animatics is the ability to integrate audio—such as dialogue, sound effects, and music—early in the process. This allows animators to see how the visuals sync with the audio, ensuring proper timing and synchronization.
- How it Improves Production:
- Voiceovers and sound effects can be tested in sync with the animation, which helps ensure that dialogue matches lip movements and actions.
- Sound Design: Animatics help sound designers test how certain sounds, like footsteps or background music, interact with visual elements.
Example: If a character delivers a punchline in a comedic scene, the animatic allows the team to test whether the timing of the dialogue, sound effects, and character movement align perfectly for comedic impact.
5. Collaborative Feedback and Adjustments
Animatics provide a visual reference for the entire production team, making it easier to collaborate and receive feedback from directors, animators, voice actors, and other departments.
- How it Improves Production:
- Instead of discussing abstract ideas or reading a script, animatics allow the team to visually see how each scene progresses, making feedback more actionable and precise.
- Since animatics are faster to create than fully animated sequences, they allow team members to quickly address issues and make changes, which is much more efficient than revising fully animated scenes.
Example: If a director or producer sees a pacing issue in a sequence, they can suggest changes to the animatic, such as adjusting the timing of a key action or reworking a camera angle, before the full animation is created.
Conclusion
In the world of animation, an animatic storyboard is more than just a helpful tool; it is an essential step in the production pipeline. It serves as the bridge between the conceptual phase of storyboarding and the intricate work of full animation. By providing dynamic, time-based visualization of a scene, animatics allow animators to refine timing, pacing, and movement before the final animation is created, saving both time and resources.
In essence, animatics serves as the blueprint that guides the entire animation production process. Without them, animators risk encountering major issues too late in production, which can lead to expensive delays or quality compromises. By incorporating animatics into their workflow, animators can enhance the quality of their work, streamline their production process, and ultimately create a more engaging and polished final product.
For any animator, understanding and utilizing animatic storyboards is a key step toward mastering the art of animation.