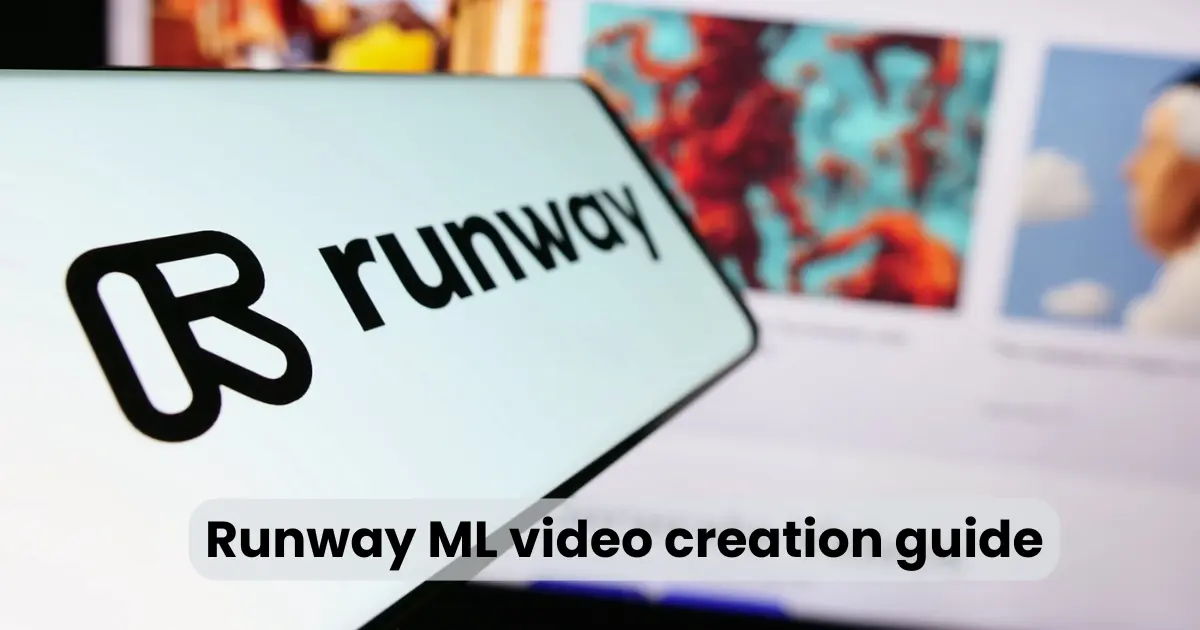
Runway ML video creation guide
Contents
In today’s fast-paced digital world, creating professional-quality videos has become easier thanks to tools like Runway ML. This Runway ML video creation guide will help you understand how to leverage this powerful platform to produce stunning videos with the help of artificial intelligence. Whether you’re a beginner or an experienced content creator, Runway ML provides a range of features that allow you to bring your creative visions to life in no time. In this guide, we’ll walk you through everything from setting up an account to exporting your final video, ensuring that you can make the most out of this innovative tool.
What is Runway ML?
Runway ML video creation guide is an innovative AI-powered creative platform designed to empower artists, filmmakers, and content creators by providing advanced tools for video and image generation, editing, and enhancement. Founded in 2018 by Cristóbal Valenzuela, Alejandro Matamala, and Anastasis Germanidis, Runway has rapidly evolved into a leading force in the field of generative AI, offering a suite of tools that bridge the gap between human creativity and machine learning capabilities.
Core Features of Runway ML
- Text-to-Video Generation: Runway’s Gen-2 model allows users to generate videos from simple text prompts, transforming written descriptions into dynamic visual content.
- Video Editing and Enhancement: The platform offers tools for real-time video editing, including background removal, inpainting, and super-slow motion effects, enabling creators to refine their footage with ease.
- AI-Powered Models: Runway provides access to various AI models, such as Gen-1, Gen-2, Gen-3 Alpha, and Gen-4, each offering unique capabilities for video synthesis and manipulation.
- Cross-Platform Accessibility: Available as a web platform and an iOS app, Runway ensures that creators can access its tools across different devices, facilitating seamless workflows.
Applications in the Industry
Runway’s technology has been instrumental in various high-profile projects, including the Oscar-winning film Everything Everywhere All at Once, music videos for artists like A$AP Rocky and Kanye West, and television shows such as The Late Show and Top Gear America.
The platform’s integration into the entertainment industry underscores its potential to revolutionize content creation by providing powerful AI tools that enhance creativity and efficiency.
Why Choose Runway ML for Video Creation?
When it comes to video creation, Runway ML offers a unique combination of cutting-edge artificial intelligence and user-friendly design, making it an excellent choice for both novice and seasoned creators. Below, we will explore Runway ML video creation guide for your video creation needs.

1. AI-Powered Features for Enhanced Creativity
Runway ML leverages the power of artificial intelligence to enhance the creative process. Its AI models, such as Gen-2 and Gen-3, allow users to generate videos from simple text prompts, a feature known as text-to-video generation. This means that you can bring your ideas to life with just a few lines of text, eliminating the need for complex scripting or filming. Moreover, the platform provides powerful tools for video manipulation, such as background removal, inpainting, and motion tracking, which can be used to improve video content without requiring advanced technical knowledge.
2. User-Friendly Interface
One of the standout features of Runway ML is its intuitive, easy-to-navigate interface. Even if you are new to video editing or AI tools, Runway provides a seamless experience that does not require specialized training. The simple drag-and-drop interface allows you to import and organize your media, apply AI-powered effects, and edit your videos without encountering steep learning curves. This makes Runway ML a go-to platform for both beginners and experienced creators who value efficiency.
3. Real-Time Video Editing
Runway ML enables real-time video editing, which is a huge time-saver for creators. With features such as automatic background removal, object recognition, and color grading, you can make adjustments instantly and see the results immediately. This real-time feedback helps you work more efficiently, making the video production process faster and less cumbersome. Whether you’re working on a tight deadline or experimenting with new ideas, the ability to preview your edits in real time is a huge advantage.
4. Cross-Platform Compatibility
Runway ML is not just limited to desktop users. The platform is available as both a web-based application and a mobile app for iOS, providing access to its powerful tools across multiple devices. This cross-platform flexibility ensures that you can work on your video projects wherever you are, whether you’re at your desk or on the go. With cloud storage, your work is also backed up and accessible from any device, reducing the risk of losing progress.
5. Collaboration Features
Runway ML allows for collaboration, making it an ideal choice for teams working on video projects. Multiple users can access and edit the same project, making it easier to share feedback, make revisions, and finalize videos collectively. This collaborative feature is perfect for agencies, production teams, and freelancers working with clients, allowing them to seamlessly work together without geographical limitations.
6. Powerful Integration with Other Tools
Runway ML also integrates with other creative tools like Adobe Premiere Pro and After Effects, providing even more flexibility in your workflow. This integration allows you to import your projects into these industry-standard platforms for more advanced editing and refinement. Additionally, Runway’s support for popular file formats makes it easy to import and export media without worrying about compatibility issues.
Getting Started with Runway ML
Getting started with Runway ML is a simple process that opens up a world of creative possibilities for video creators. Whether you’re a beginner or experienced professional, Runway offers an intuitive interface and powerful tools that make video creation easier. In this section of the Runway ML video creation guide, we’ll walk you through the initial steps to get set up and start creating your own AI-powered videos.

1. Creating an Account
To begin using Runway ML, you’ll first need to create an account. The sign-up process is quick and straightforward. Follow these steps:
- Step 1: Visit the Runway ML website.
- Step 2: Click on the “Sign Up” button located at the top right of the homepage.
- Step 3: You can sign up using your Google account, Apple ID, or create a new account with your email address.
- Step 4: After completing the sign-up process, you may need to confirm your email address through a verification link sent to your inbox.
Once your account is active, you can log in and begin exploring the platform.
2. Exploring the Dashboard
Once you’ve logged into Runway ML, you’ll be directed to the dashboard. This is your central hub where you can manage all your projects, explore AI models, and start new creative endeavors. Here’s what you’ll see on the dashboard:
- Projects Overview: The main page shows all your active and archived projects. You can click on any project to open it and start working on it.
- Create a New Project: If you’re ready to start a new video project, simply click on the “New Project” button. You’ll be prompted to choose a project name and select the type of video or media you want to create.
- AI Model Library: From the dashboard, you can explore the various AI models Runway offers, such as video synthesis, text-to-video generation, object tracking, and more. You can easily integrate these models into your project.
The user interface of Runway ML is designed to be as intuitive as possible. Here’s a quick overview of the key elements of the interface:
- Top Navigation Bar: This bar includes buttons to create new projects, access settings, and check notifications about your account or projects.
- Workspace: The workspace is where you’ll spend most of your time. It’s where you can import media, apply AI-powered tools, and edit your videos.
- AI Tools and Models: On the left side, you’ll find the panel that displays various AI models you can integrate into your projects. You can select the model you want to work with and drag it into the workspace.
- Timeline: Similar to most video editing software, Runway includes a timeline where you can arrange video clips, add effects, and make adjustments to the sequence.
4. Setting Up the Workspace
Before diving into video creation, you’ll need to set up your workspace. Here’s how you can do it:
- Step 1: Click on “New Project” and select the type of media you’ll be working with, such as video, images, or both.
- Step 2: Import your media files into the workspace. You can do this by dragging and dropping video clips or images into the timeline or using the “Upload” button.
- Step 3: Organize your media files on the timeline. Arrange them in the desired order and start planning your video sequence.
- Step 4: Select the appropriate AI tools to start transforming your media. For example, if you’re working with video, you can use Runway’s background removal tool, motion tracking, or text-to-video models to enhance your footage.
5. Setting Up AI Models
One of the most powerful features of Runway ML is its collection of AI models that help transform your media. To begin using these models:
- Step 1: From the dashboard or workspace, go to the “AI Models” section and browse through available models.
- Step 2: Choose the model that best fits your project needs. For example, if you want to add AI-generated text to your video, you can use the Text-to-Video feature.
- Step 3: Drag the model into your workspace, and follow the prompts to configure the model settings. For text-to-video, you’ll enter a script, and the model will generate video content based on your input.
6. Connecting Your Camera or Devices
If you want to record content directly into Runway, you can connect your camera or devices:
- Step 1: Plug in your camera or connect it via your device’s settings.
- Step 2: In Runway’s interface, click on the “Input” section and select your connected camera.
- Step 3: You can then start recording your video directly in the workspace or use the recorded footage for editing and enhancement.
7. Exploring Templates and Pre-built Projects
Runway ML also offers pre-built templates and project starters that can save time. These templates are designed to streamline your workflow and give you a head start on your video creation. You can find these templates under the “Templates” section in the dashboard.
Preparing Your Project
Before diving into the Runway ML video creation guide, it’s essential to properly prepare your project. Planning and organizing your project beforehand will save you time, help streamline your workflow, and ensure that the final result meets your expectations. In this section, we’ll go over the steps involved in preparing your video project on Runway ML, from selecting the right assets to configuring your workspace for optimal results.

1. Define Your Project Goals and Concept
The first step in preparing your project is defining its goals and overall concept. Having a clear vision for Runway ML video creation guide which help you make decisions about the AI models, media assets, and tools to use.
- Step 1: Think about the purpose of your video. Are you creating a marketing video, a short film, a tutorial, or an experimental piece of art? Understanding your end goal will shape the project.
- Step 2: Define the style and tone of your video. Will it be playful, dramatic, informative, or artistic? Knowing your tone will influence your choice of assets and editing techniques.
- Step 3: Outline the key scenes or segments in your video. This will help you determine what AI models and media you’ll need for each part.
2. Gather Your Media Assets
Once you have a clear vision for your project, it’s time to gather the media assets you’ll use. These assets could include video clips, images, audio files, and other elements necessary for your video.
- Step 1: Choose the footage or images that align with your project’s concept. If you’re using original footage, make sure it is high quality and relevant to the narrative you want to create.
- Step 2: Consider using stock footage or images if you don’t have original content. Runway ML integrates well with various stock libraries, so you can easily import these assets into your project.
- Step 3: If you plan to use text-based prompts for AI models like text-to-video generation, write out the scripts or keywords in advance. This will help you quickly generate videos based on the text.
3. Select the Right AI Models
Runway ML offers a wide variety of AI models to choose from, depending on the type of video you want to create. These models allow you to perform tasks like video generation, style transfer, object tracking, background removal, and more.
- Step 1: Review the list of AI models available on Runway and select those that fit your project. For instance, if you want to generate a video from a text prompt, you’ll want to use a text-to-video model. If you need to remove the background from a video clip, you can use the background removal model.
- Step 2: Read through the documentation for each model to understand how to properly configure it for your project. Runway ML provides helpful tutorials and guides to get the best results from each model.
- Step 3: Plan how you will integrate these models into your video. Will you apply them to specific scenes, or will the entire video be AI-generated? It’s essential to know how and when you’ll be using the models.
4. Set Up Your Workspace
Now that you have your assets and models ready, it’s time to set up your workspace in Runway ML. A well-organized workspace will help you stay efficient and make editing smoother.
- Step 1: Create a new project by selecting the type of media you’ll be working with (video, images, or both). This will set the stage for your project.
- Step 2: Import your media assets into the workspace. You can either upload files directly from your computer or import from stock footage libraries.
- Step 3: Organize your media on the timeline. You can drag and drop clips, images, and audio to arrange them in the order you envision for the video.
- Step 4: Set up the AI models you plan to use. Add them to the timeline or workspace and configure each one according to the instructions. Some models may require you to input text prompts or adjust sliders for specific parameters.
5. Plan Your Video Workflow
Effective workflow planning is key to saving time and ensuring a smooth editing process. Depending on your project’s complexity, break down the steps involved in the creation and editing phases.
- Step 1: Start by establishing the key scenes or milestones for your video. If you’re working with multiple AI models, plan how they will be applied to different sections of the video.
- Step 2: Outline the edits or transformations you want to apply. For example, you may want to adjust lighting, colors, or sound before using AI-powered tools for effects or enhancements.
- Step 3: If you’re collaborating with others, share the workflow with your team. Runway ML allows for team collaboration, so it’s crucial that everyone understands their role and the steps needed to move forward.
6. Test Your Setup
Before fully diving into the production, it’s wise to run a few test simulations of your project. This will help you identify potential issues early on and ensure that the AI models are performing as expected.
- Step 1: Test each AI model on a small portion of the video. This allows you to see the results without wasting too much time if adjustments are needed.
- Step 2: Check the final output for any glitches or errors in transitions, effects, or AI-generated content. If something doesn’t look right, tweak the model settings or edit the media accordingly.
- Step 3: Make sure the media elements are properly aligned and the timeline is in sync. Sometimes, small adjustments are required to ensure the video flows smoothly.
7. Backup Your Work
One of the most important steps in preparing any project is to ensure that your work is backed up. Runway ML offers cloud storage, so you don’t have to worry about losing your progress.
- Step 1: Save your project regularly to prevent any data loss. Runway’s autosave feature helps, but it’s always good practice to manually back up your work periodically.
- Step 2: Consider exporting a copy of your project in case you want to continue working on it later or share it with collaborators.
Using Runway ML Tools for Video Creation
One of the standout features of Runway ML is its powerful suite of AI tools that simplify the video creation process. These tools, built on machine learning and artificial intelligence, enable you to elevate your video projects in ways that would be difficult or time-consuming using traditional methods. Whether you’re enhancing footage, generating new content, or editing video in unique ways, Runway ML’s tools offer a wide range of capabilities. In this section of the Runway ML video creation guide, we’ll explore how to use these tools effectively.

1. Text-to-Video Generation
One of the most innovative tools Runway ML offers is text-to-video generation. This tool allows you to create video content directly from a textual description, making it an excellent choice for creators looking to generate quick content or experiment with AI-driven narratives.
- Step 1: Select the Text-to-Video model from the AI tools library. This model uses natural language processing to interpret written prompts and generate relevant video clips.
- Step 2: Write a brief description of the video you want to create. For example, if you’re making a short film, you could input, “A futuristic city with flying cars, neon lights at night, and bustling streets.”
- Step 3: After inputting your text, Runway ML will generate a video based on your prompt. You can refine the description or provide additional details to improve the video’s accuracy.
- Step 4: Once the video is generated, you can adjust parameters like the length, speed, and visual effects to match your vision.
This tool is ideal for creating quick prototypes, visualizing ideas, or experimenting with different scenarios without having to manually shoot footage.
2. Background Removal Tool
Another highly useful feature for video creation is background removal, which allows you to isolate subjects in your video, making them stand out against transparent or custom backgrounds. This tool is especially helpful for green-screen effects and for those looking to replace or remove backgrounds without requiring complex editing.
- Step 1: Select the Background Removal model in your project.
- Step 2: Upload your video clip to the workspace. Runway ML will automatically detect the foreground (the subject of your video) and separate it from the background.
- Step 3: Adjust the settings to fine-tune the background removal. You can refine edges or adjust the sensitivity to get a cleaner cut-out of your subject.
- Step 4: Once the background is removed, you can either leave it transparent or replace it with a new background, like a still image or another video.
This tool makes compositing video much easier, as you no longer need to rely on labor-intensive manual masking or chroma key techniques.
3. Motion Tracking and Object Tracking
For videos that require object tracking, whether to attach text, graphics, or follow movement, motion tracking and object tracking are invaluable tools. These tools allow you to track specific objects within your video and apply effects to them in real-time.
- Step 1: Choose the Object Tracking or Motion Tracking model from the AI tools panel.
- Step 2: Select the object in your video that you want to track. This could be anything from a person to a specific item in the frame.
- Step 3: Run the tracker and let Runway ML automatically detect and follow the object as it moves across the screen.
- Step 4: Once the tracking is complete, you can apply various effects or elements that follow the movement of the tracked object, such as labels, shapes, or animations.
This feature is particularly useful for dynamic shots, allowing you to create immersive videos that respond to the motion within the scene.
4. Style Transfer
Style Transfer is a unique tool that allows you to apply the visual style of one image to your video, transforming the look of your footage. Whether you want to turn your video into a painting, apply an artistic style, or mimic the look of a famous artist’s work, this tool has endless creative potential.
- Step 1: Select the Style Transfer model from the tools list.
- Step 2: Upload the video you want to transform and choose an image that represents the style you want to apply. This could be a painting, a textured image, or even a photograph.
- Step 3: Run the style transfer model. The tool will analyze the chosen image and apply its visual elements to your video, giving it a completely new look.
- Step 4: You can tweak the strength of the style transfer to make the effect more subtle or bold, depending on the desired outcome.
Style Transfer is perfect for creating visually distinct videos, as it allows you to break away from traditional video aesthetics and explore new visual languages.
5. AI-Powered Sound Design
Sound plays a crucial role in the storytelling of any video, and Runway ML offers tools to enhance your audio through AI. Whether you need to create a soundscape, generate music, or match sound to visual elements, the AI-powered sound design tools are a great option.
- Step 1: Choose the AI Music Generation model or the Sound Design tool from the AI library.
- Step 2: If you’re using the AI Music tool, input the type of music or mood you’re looking for, such as “ambient electronic music” or “upbeat pop tune.” Runway will generate a track based on your preferences.
- Step 3: You can sync your generated music with the visuals on your timeline, ensuring that the audio complements the video in both tone and rhythm.
- Step 4: For sound design, you can use AI to generate sound effects or match audio to the specific actions within your video, such as footsteps, background noise, or object interactions.
AI sound design ensures that your video has a professional, polished sound without the need for extensive manual editing.
6. Text and Captioning Tools
Another helpful tool is the Text-to-Speech and Captioning Tool, which allows you to generate captions or voiceovers for your videos. This is essential for accessibility, translations, or simply adding voice narration.
- Step 1: Choose the Text-to-Speech or Captioning model from the tools menu.
- Step 2: Enter your script or the text you want to appear as captions.
- Step 3: Adjust the timing to synchronize the text with the audio or video, ensuring that captions appear at the correct moments.
- Step 4: For Text-to-Speech, select the voice style and language, and Runway will automatically generate the narration for your video.
This tool makes it easy to add voiceovers or subtitles without needing a separate recording setup or manual transcription.
7. AI Video Editing
In addition to the specific AI models, Runway ML also offers several editing tools that streamline the video editing process. From cutting and trimming clips to adding transitions and effects, these tools provide powerful editing features without the need for advanced software.
- Step 1: Select the video clips you wish to edit and use the editing toolbar to trim, cut, or merge them.
- Step 2: Use transitions or apply filters to create smooth cuts between scenes or change the mood of your video.
- Step 3: You can also add special effects, such as color grading, motion graphics, or overlaying objects onto your video.
These editing tools, combined with the AI features, offer a comprehensive solution for creating professional-quality videos quickly.
Exporting Your Final Video
Once you’ve used Runway ML’s advanced tools to create and refine your video, the final step is to export it. Exporting your project correctly ensures that the final product is in the desired format, ready for sharing or further editing. In this section of the Runway ML video creation guide, we will walk you through the process of exporting your video efficiently, ensuring you maintain the highest quality possible.

1. Selecting the Export Settings
Runway ML provides a range of export options that let you choose the right format, resolution, and compression settings based on your needs. Here’s how to set up your export:
- Step 1: In the project workspace, click on the Export button, typically located at the top or bottom of your project screen.
- Step 2: A pop-up window will appear where you can select the export settings. You will need to choose:
- Format: Common formats include MP4, MOV, and AVI. MP4 is the most widely supported format and is recommended for most use cases.
- Resolution: Choose the resolution that suits your needs. For high-quality videos, 1080p (Full HD) or 4K are great options. For social media, 720p may be sufficient.
- Frame Rate: The frame rate (such as 24fps or 30fps) will influence the smoothness of the video. Stick to 24fps for cinematic looks, or choose 30fps for regular online video content.
- Bitrate: A higher bitrate will result in better video quality, but it will also increase the file size. If you are aiming for high-quality content, a higher bitrate is preferred.
- Step 3: Once you’ve chosen the right settings for your video, proceed to the next step by clicking on the Apply or OK button to save these preferences.
2. Previewing Your Export
Before finalizing the export, it’s a good idea to preview the video one last time. This ensures that everything from the edits to the added AI elements looks as you expect.
- Step 1: Click the Preview button (if available) to review your final video. This feature will allow you to see the exported video with all the edits, effects, and transitions applied.
- Step 2: Pay attention to elements like text alignment, audio syncing, and transitions to ensure that no issues were introduced during the editing process.
If everything looks good, you can move on to exporting the final video. If not, you can go back to your workspace and make necessary adjustments.
3. Exporting the Video
Once you’re satisfied with the preview, it’s time to export your video:
- Step 1: Click on the Export button to start the process. Depending on the size of your video and the settings you selected, this process may take a few minutes or longer.
- Step 2: You will see a progress bar or a notification indicating the status of your export. Runway ML will automatically compress and prepare the video for download.
- Step 3: Once the export is complete, you will receive a notification letting you know the video is ready for download.
4. Downloading Your Video
After the export process is finished, downloading the video to your local device is the next step:
- Step 1: Click on the Download button to retrieve the exported video file.
- Step 2: Choose the location on your device where you want to save the file, and ensure you have enough space for the video file, especially if it’s a large, high-quality project.
5. Optimizing for Distribution
Depending on how you plan to share your video, you may want to optimize it further before distribution. Here are a few tips:
- Compression: If you need to reduce the file size without sacrificing too much quality, you can use a video compression tool to make the file smaller. This is especially helpful for uploading videos to websites or social media platforms with size restrictions.
- Watermarking: If you are creating content for clients or want to protect your intellectual property, consider adding a watermark before exporting. Runway ML allows you to overlay text or images as watermarks during the export process.
- Metadata: Add relevant metadata, such as titles, descriptions, and tags, before uploading the video to platforms like YouTube, Vimeo, or social media. This helps with video discoverability and SEO.
6. Uploading Your Video
Once you’ve exported and optimized your video, you can upload it to your desired platform. If you’re uploading to a social media platform like Instagram, Facebook, or YouTube, ensure that you adhere to the platform’s specific video format and resolution guidelines for the best results.
- Step 1: Log into the platform where you want to upload your video.
- Step 2: Follow the upload procedure for that platform, ensuring the video is in the right format, resolution, and size.
- Step 3: Add captions, titles, and tags to maximize engagement and visibility.
7. Backup Your Project
It’s always a good idea to keep a backup of your video project files. Runway ML allows you to save your work within the platform, but it’s recommended to also save the exported video on your device or in the cloud for safe keeping.
Best Practices for High-Quality Videos
In this section of the Runway ML video creation guide, we will walk you through to creating high-quality videos is essential for making a lasting impact, whether you’re producing content for marketing, education, entertainment, or social media. With Runway ML’s tools at your disposal, you can create videos that look professional and engaging. However, achieving the best results involves more than just using advanced AI technology. It requires attention to detail, thoughtful planning, and careful execution. Here are the best practices for creating high-quality videos using Runway ML.

1. Plan Your Video Ahead of Time
Before diving into the video creation process, careful planning is crucial. This includes defining the purpose of your video, the target audience, and the core message you want to convey. Here are some steps for effective planning:
- Write a Script: A well-structured script will help guide the flow of the video and ensure that you stay focused on your main message.
- Storyboard Your Ideas: Create a storyboard to visually map out how your video will unfold. This will help you decide on the necessary scenes, camera angles, and transitions.
- Identify Key Visual Elements: Determine what visuals you’ll need, whether it’s 3D models, animations, graphics, or AI-generated content.
Planning not only saves time during production but also helps prevent errors and improves the overall quality of the video.
2. Use High-Resolution Assets
To ensure your video looks crisp and professional, it’s important to work with high-quality assets. Runway ML allows you to use high-resolution images, videos, and 3D models in your project, but the resolution of the assets you use can directly affect the outcome.
- Use High-Resolution Images: Make sure your images and videos are high resolution. Low-quality images can appear pixelated or blurry when rendered in a final video.
- Optimize 3D Models: When incorporating 3D models, ensure they are created with high polygon counts for maximum detail. Runway ML supports high-quality 3D assets that you can manipulate and animate for realism.
3. Keep Your Video Well-Lit
Lighting is essential for video production, even when using AI tools like Runway ML. Proper lighting enhances the quality of your video and adds depth to your visuals. Here’s how to approach lighting:
- Natural Light: If possible, shoot in natural light or in an environment with soft, diffused lighting. This can create a more professional and polished look.
- Three-Point Lighting Setup: For more controlled lighting, use the three-point lighting method: key light, fill light, and back light. This helps eliminate harsh shadows and creates a more dynamic look.
- Experiment with Shadows and Highlights: Use Runway ML’s lighting tools to experiment with shadows and highlights in your 3D models or animations. This adds depth and realism to your video.
4. Maintain a Consistent Style
Consistency is key when creating high-quality videos. A consistent style across all visual elements helps create a cohesive video that looks polished and professional. Here’s how to maintain consistency:
- Choose a Color Palette: Stick to a color scheme that complements the message and tone of your video. Runway ML allows you to adjust color settings to match the desired mood or branding.
- Typography Consistency: Use the same font family and style throughout your video. Runway ML offers various text effects that can enhance readability and ensure uniformity across the video.
- Animation Style: If your video involves animations, keep the style consistent. Whether you’re using hand-drawn animations, 3D animations, or motion graphics, make sure the style matches the tone of your video.
5. Pay Attention to Audio Quality
Audio quality plays a significant role in the overall production value of a video. Runway ML allows you to add and edit audio within the platform, but it’s crucial to ensure the audio complements the visuals.
- Clear Dialogue: If your video includes dialogue, make sure it is clear and easy to understand. Use noise reduction tools if necessary to remove background noise.
- Use High-Quality Sound Effects: High-quality sound effects enhance the realism of your video. Runway ML supports adding audio, but be sure to source high-quality sound effects that match the action on screen.
- Balance the Audio: Ensure that background music, sound effects, and voiceover are balanced. The voiceover should be clear and not overshadowed by background sounds.
6. Optimize Video Editing for Smooth Transitions
Editing is where you can refine your video and ensure it flows smoothly. Runway ML offers a variety of tools for fine-tuning your video’s transitions, timing, and effects. Here’s how to optimize the editing:
- Use Smooth Transitions: Avoid abrupt scene changes. Use smooth transitions like fades, wipes, or dissolves to create a seamless flow between scenes.
- Maintain Proper Timing: Proper timing is essential for pacing the video correctly. Use Runway ML’s tools to control the timing of animations, effects, and scene changes.
- Cut Unnecessary Footage: Keep your video concise by cutting out unnecessary content. Viewers tend to lose interest if the video is too long or has filler content.
7. Test the Final Output
Before exporting your final video, always test it on different devices to ensure it plays as intended. Check for any inconsistencies, such as color mismatches, audio distortions, or lagging effects.
- Test on Multiple Platforms: Play the video on different devices like phones, tablets, and desktop computers to ensure the quality remains consistent across platforms.
- Review on Different Screen Sizes: If your video is going to be viewed on various screen sizes, make sure it looks good on both small and large screens.
8. Optimize Your Video for SEO
If your video will be shared online, it’s essential to optimize it for search engines to improve visibility. This includes adding metadata and tags to make the video more discoverable. Here’s how to do it:
- Title and Description: Use relevant keywords in your video’s title and description to improve SEO. Make sure to include keywords like “Runway ML video creation” and “AI video editing” in these sections.
- Tags and Categories: Tag your video with relevant keywords that will help it appear in search results. Categories can also help the video reach the right audience.
Conclusion
In summary, Runway ML offers powerful tools that empower creators to bring their video projects to life with the help of AI and advanced features. From the initial planning and preparation stages to using the platform’s intuitive tools for editing and creating stunning visuals, Runway ML is a valuable asset for anyone looking to make high-quality videos. However, success lies not just in using the technology, but also in following best practices, avoiding common mistakes, and focusing on key aspects like lighting, audio, consistency, and resolution.
By following the tips and recommendations provided in this guide, you’ll be able to create polished, professional videos that capture your audience’s attention. Whether you’re producing content for personal projects, marketing, or social media, taking the time to plan your video, use high-quality assets, and apply thoughtful editing techniques will ensure a successful outcome. With Runway ML, you can unleash your creativity, streamline your workflow, and produce videos that stand out in today’s competitive digital landscape. So, embrace the potential of AI-driven video creation and start crafting compelling videos that resonate with your audience and make an impact.